dotfilesync
Sync dotfiles with Gist
What is dotfilesync?
dotfilesync is a bash script that syncs a list of local files that you define, into a secret gist, that you own.
dotfilesync is very easy to use as it stores your gist credentials into an encrypted Keychain, so you don’t have to provide it each time.
You are not limited to syncing only dotfiles. Although this tool is meant for you to sync local dotfiles, it can also be used to sync any file that can be synced with gist.
This script is inspired by this post on how the author syncs zshrc to their gist.
Features
Config driven
dotfilesync uses a JSON config using a hardcoded path - ${HOME}/.dotfilesync/config.json - to retrieve metadata needed to sync local files to gist.
A sample config shape can look like this:
{
  "githubUser": "snvishna",
  "gistId": "8f1bd18cf47f9d3efb8dc0a88a4e57aa",
  "dotFilePaths": [
    "~/.dotfilesync/config.json",
    "~/.zshrc",
    "~/.bash_profile",
    "~/.ssh/config",
    "~/.scripts/a.sh",
    "~/.scripts/b.sh"
  ]
}
Tools used as Keychain
This tool stores and manage your GitHub Personal Access Token within into an encrypted Keychain. This way your token is safe and encrypted by the Keychain, and you don’t have to provide it each time you run the command to sync files.
For OS X based operating systems, the OSX security command is used.
For Linux based operating systems, the secret-tools command is used to interact with GnomeKeyring. For more info about keyrings used on Linux systems read this article.
Sync multiple files into a single secret gist
All local files that are listed in the config.json file are synced into a single gist. As long as you have a valid config.json file in the ${HOME}/.dotfilesync directory
Auto-generate gist filenames
The file names in gist are automatically created. This script is opinionated on the file names being created. The characters “/” and “~” are replaced with periods (.). Duplicate consecutive periods in the name are also removed.
Prompts before syncing each file
Every file listed in the config.json, whether being pushed to or pulled from gist, is synced only after a confirmation prompt. A sync is performed only after you enter a “y” or a “yes” (case-insensitive). Any other input is ignored from sync.
Creates a backup of the local file contents before overriding
During a fetch operation (syncing local files from gist), a sync is performed, only after creating a backup of the local file. The backup file name is auto-generated based on the current timestamp.
Prerequisites
This script uses jq to parse the config.json on the local filesystem.
OS X
You can run the following command on OS X, if you have Homebrew installed:
brew install jq
Linux
You can install the required packages on a Debian based distro running the following command:
apt-get install jq libsecret-tools
Installation
Ensure the prerequisite tools are setup. Installing dotfilesync is easy and a one-time effort:
-
Start a Zsh shell:
zsh -
Fetch the script locally:
-
With curl:
mkdir -p ${HOME}/.dotfilesync \ && curl -fsSL https://raw.githubusercontent.com/snvishna/dotfilesync/master/src/dfsync.sh \ >| ${HOME}/.dotfilesync/dfsync.sh -
With wget:
mkdir -p ${HOME}/.dotfilesync \
&& wget -nv -O - https://raw.githubusercontent.com/snvishna/dotfilesync/master/src/dfsync.sh \
  >| ${HOME}/.dotfilesync/dfsync.sh
-
Add an entry in zshrc:
You’ll find the zshrc file in your $HOME directory. Open it with your favorite text editor and add the following alias in there:
alias dfsync='bash ${HOME}/.dotfilesync/dfsync.sh'You can now use the
dfsynccommand after you restart the terminal, or source your zsh config. -
Create Person Access Token on GitHub:
You can create a new person access tokens page for running the script on the command line. Follow these instructions on how to create one. Make sure you have the gist scope selected to grant permission on this token.
Once you generate the personal access token, either copy it on your clipboard, or save it somewhere, since the script will need this to store within the Keychain, before syncing your files in gist.

-
Run setup:
Run the command
dfsync setupfrom your terminal. It prompts for your GitHub username and the personal access token. Refer to the Commands section for more details on this command.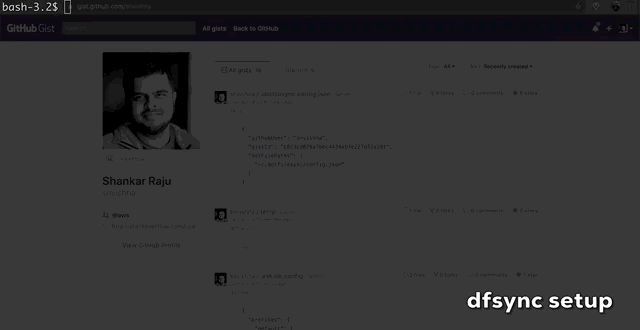
-
You’re done! Enjoy dotfilesync!
Usage
-
Update the
config.jsonfile with a list of local file paths that you’d like to sync with gist. You can now rundfsync pushto upload these files in the gist.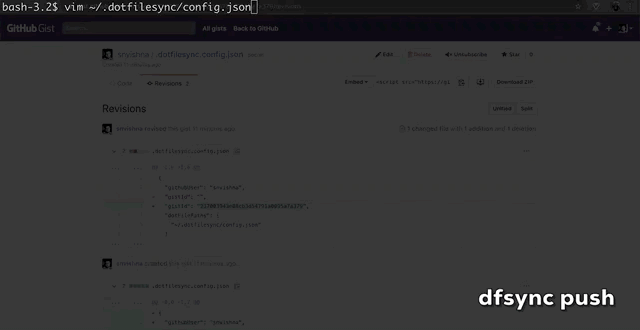
Commands
-
dfsync setup
It is run only once as part of the installation instructions. This command does the following:
-
Prompts for your GitHub username and the personal access token. It then stores this information securely in the Keychain.
-
Creates a new secret gist in your account with the description - “Generated by dotfilesync utility”.
-
It then creates a new
config.jsonfile, and auto-populates your Github username and the gistId fields. -
Saves this file in the
${HOME}/.dotfilesyncdirectory. -
It also syncs this config file to this gist.
It is a good practice to leave the
config.jsonfile to sync with your gist, so you can recover or download these files with thedfsync pullcommand when you need them. -
-
dfsync push
Use this command to push all local file contents into the secret gist defined in the
config.jsonfile. This command will prompt you before syncing each file. You can type “Y” or “y” for the file contents to be pushed. You can type any other character, or just hit enter to skip syncing this file. This command will work only after thedfsync password saveis run once, so the personal access token is saved. -
dfsync pull
Use this command to fetch all local file contents into the secret gist defined in the
config.jsonfile. This command will prompt you before syncing each file. You can type “Y” or “y” for the file contents to be fetched. You can type any other character, or just hit enter to skip syncing this file.To be safe and not corrupt your local file contents, the command will initiate a backup of the local files (using a timestamp), and only then overwrites the contents of the file. Use can use these backup files to recover to the previous state.
This command will work only after the
dfsync password saveis run once, so the personal access token is saved. -
dfsync cleanup
This command will do the following:
- Delete the saved GitHub gist credentials from the Keychain.
- Delete
config.jsonfile from the${HOME}/.dotfilesyncdirectory. - It does not automatically delete the saved gist from your GitHub account. Rather, it prints out the HTTP link to your gist, so you can choose to delete it.
- It provides a link to the uninstall instructions in this README, so you can run the commands to delete the script and update the zsh config.
Uninstall
You can cleanup the script and all resources created by it, using the following instructions:
-
Run
dfsync cleanupYou can run the command to 1) Delete the saved GitHub gist credentials from the Keychain 2) Delete
config.jsonfile from the${HOME}/.dotfilesyncdirectory. -
Delete the gist
To be safe, the clean up command does not automatically delete your gist from your account. You can choose to do this manually. The URL to your gist will be printed on the terminal when you run
dfsync cleanup. -
Delete the local file
You can now delete the dotfilesync directory from your machine. Run the following command:
rm -rf ${HOME}/.dotfilesync -
Remove alias from zsh config
You should now remove the
dfsyncalias from the zsh config. Otherwise this command will fail on the missing file path.